
Hello everyone, i’m Nick and welcome to my art blog. In this post, we’re going to explore the concept of isometric perspective—a straightforward yet powerful technique that can take your art to new heights. But before we start, let’s understand why perspective is essential in art.
Perspective serves as a cornerstone in art. It’s how artists create depth and dimension on a flat canvas. But what sets isometric perspective apart? How can it amplify your artistic skills? Let’s uncover the answers and discover the practical applications of isometric perspective in your art.
What Is Isometric Perspective?
Isometric perspective, sometimes referred to as isometric projection, is a unique technique employed by technical illustrators and artists. Unlike traditional linear perspective methods that aim to recreate how the human eye perceives objects receding into the distance, isometric perspective takes a different approach.
In isometric perspective, there is no need for horizons or vanishing points. This technique doesn’t alter the size of objects based on their distance from the viewer. Whether an object is close or far away, it remains the same size, offering a consistent and distinctive visual representation.
The viewpoint in isometric perspective is from above, looking down onto the subject. This vantage point provides us with a view of an object’s three planes, allowing for a comprehensive understanding of its form and structure.
In essence, isometric perspective is a simplified yet powerful tool that provides a clear and uncluttered depiction of objects, making it particularly useful for technical and illustrative purposes.
What Is Isometric Perspective Used For?
Isometric perspective finds its application in a range of fields due to its unique qualities. Here are a few notable uses:
Exploded Diagrams
Isometric perspective is a valuable tool for creating exploded diagrams. These diagrams serve the essential purpose of breaking down complex objects or structures into their individual components, making them easier to understand. By using isometric perspective, technical illustrators can maintain the consistency of object size, allowing viewers to grasp how different parts fit together seamlessly. This clarity is crucial in industries like engineering, where precision and comprehension are paramount.
Computer Games
Isometric perspective has left its mark on the world of computer games. It provides a fixed and easily navigable view of game environments. This perspective offers players a three-dimensional feel while simplifying the rendering process. Isometric graphics are known for their charm in strategy and simulation games, contributing to the immersive experience without overwhelming hardware resources.
Product Designs
In product design, isometric perspective is a go-to choice for rendering prototypes and conceptual models. Its consistency in object size and three-plane view are advantageous when showcasing how a product will appear from various angles. This makes it an effective tool for presentations and pitches, helping stakeholders visualize the final product with clarity.
These are just a few examples of how isometric perspective is harnessed in different industries to enhance communication, presentation, and creativity. Its straightforward nature makes it a versatile technique with applications applications that span from technical communication to creative endeavors.
How to Draw in Isometric Perspective:
The first step in isometric drawing is setting up an isometric grid. This grid serves as our guide, similar to how converging lines work in linear perspective. However, in isometric perspective, things are a bit different. All the diagonal lines on this grid remain parallel to each other; there’s no convergence towards a vanishing point, and there’s no need to worry about horizons. It’s a simple and essential tool to help us create precise and stunning isometric drawings.
How to Draw an Isometric Grid:
Begin by drawing a single horizontal line at the bottom of your page. This line will serve as the baseline for your isometric grid. Locate the center point of this horizontal line and mark it. From this center point, draw a vertical line straight upward. This vertical line will be a crucial reference for constructing your isometric grid.
Starting from the point where the vertical line meets the horizontal baseline, draw a diagonal line at an angle that is 30° above the horizontal line. This diagonal line should slant upwards to the left. Repeat the process on the other side of the central vertical line. Draw another diagonal line, also at a 30° angle above the horizontal, but this time slanting upwards to the right.

Continue adding the rest of the diagonal lines to complete the isometric grid. Draw these lines parallel to one another, extending from left to right and from right to left. Ensure that all these lines are equally spaced apart from one another. Once you’ve added all the diagonal lines, you will have constructed a basic isometric grid. This grid will serve as your guide for drawing in isometric perspective, allowing you to create precise and structured isometric illustrations.
Drawing in Isometric Perspective:
Start by drawing a vertical line at the intersection point of two diagonal lines on your isometric grid. This vertical line will represent one of the corners of a three-dimensional box.
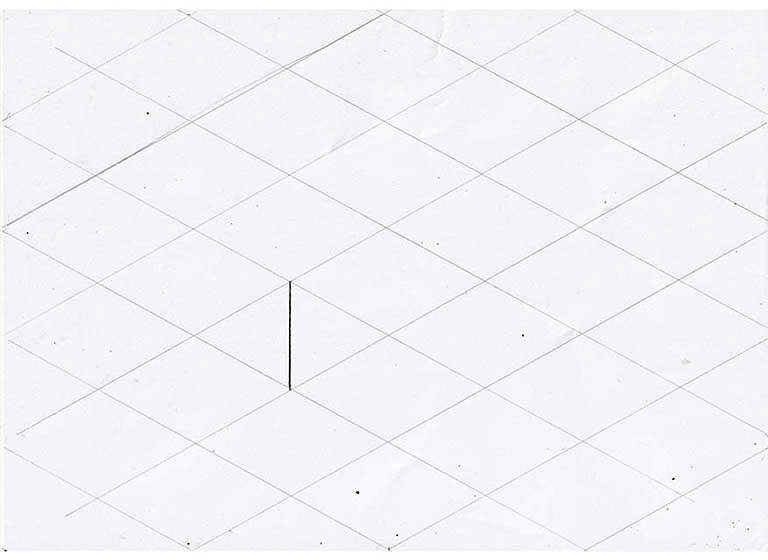
To define the left and right planes of the box, draw diagonal lines that are parallel to the construction lines of your isometric grid. These diagonal lines will extend from the top and bottom of the vertical line you drew in Step 1.
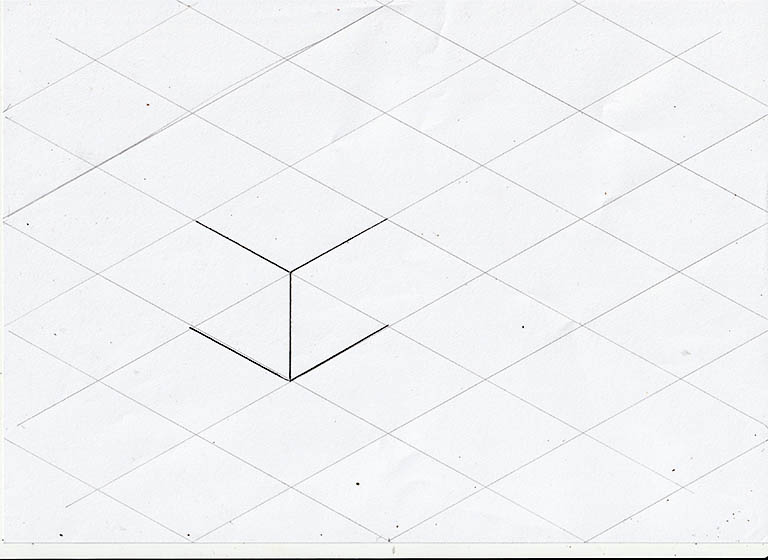
To complete the isometric box, connect the vertical lines to the sides of the box and add diagonal lines at the top. This final step will result in a fully formed isometric box.

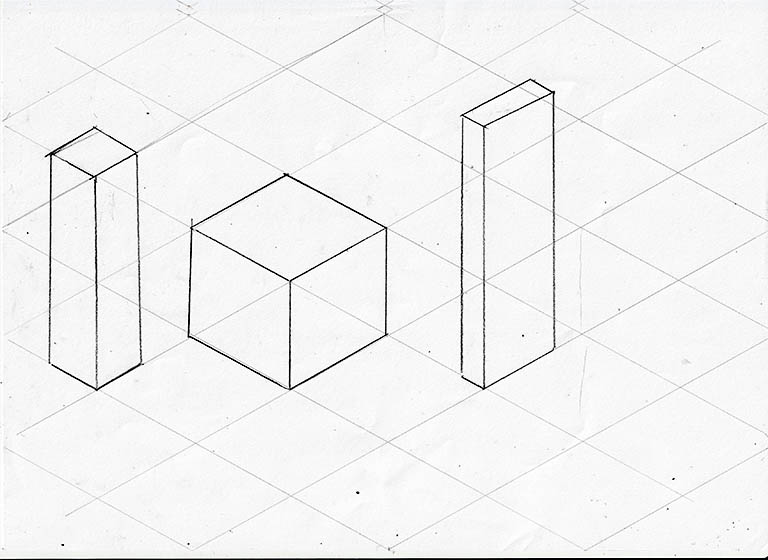
Now, you can see the three planes of an isometric box clearly. A unique property of isometric boxes is that we can observe all surface areas of each plane equally. This equality arises because there is no vanishing point in isometric perspective; all lines remain parallel to one another, preserving the proportions and making it easier to represent three-dimensional objects with precision.
You can add boxes of different shapes and sizes to your grid, as long as you keep the diagonal lines parallel. This ensures all objects maintain the same isometric perspective, with consistent sizing and proportion.
Other Shapes:
These principles can be applied to other shapes.
Triangles
Begin by drawing a rectangle in isometric perspective. This rectangle will serve as the base of your triangle.
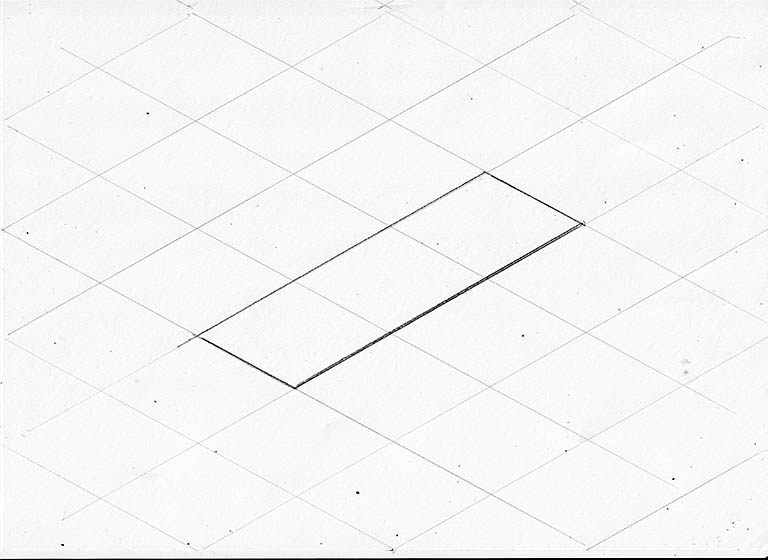
Using a ruler, find the center of the front-facing plane of your rectangle. This will help you determine the height of the triangle as well. Once located, draw a vertical line extending upwards from this center point.
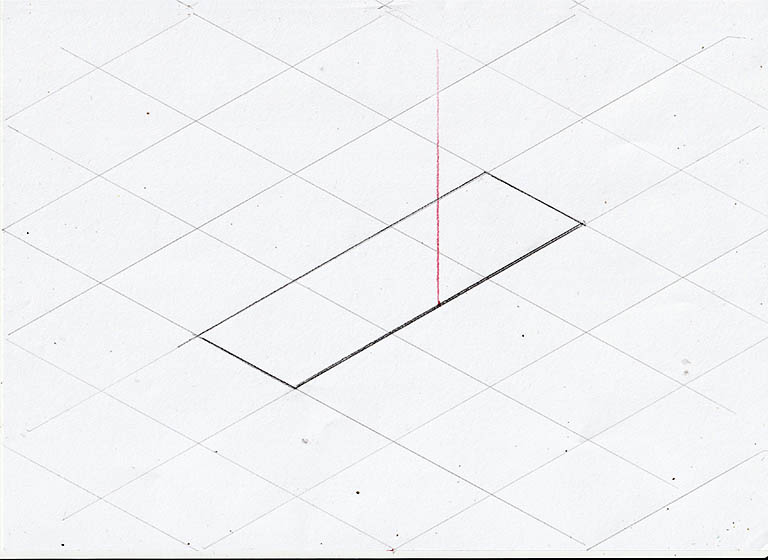
Connect the two corners of the front-facing plane of your rectangle to the vertical line. This will create one side of your triangle.
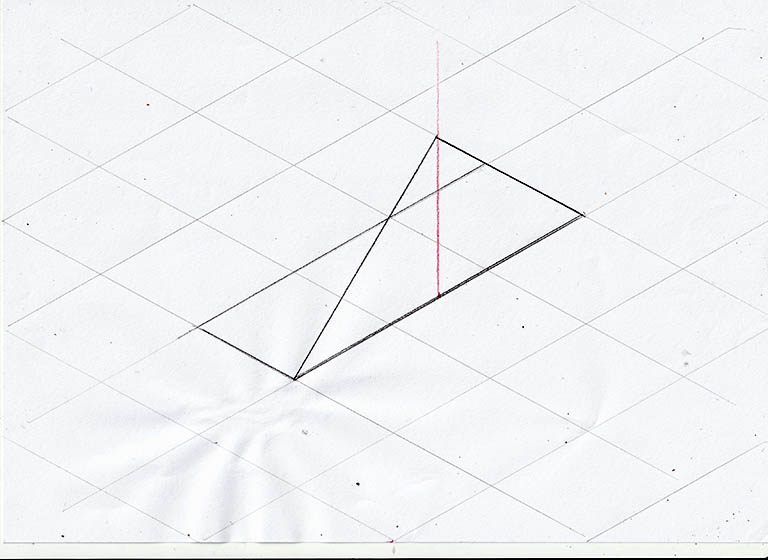
Using your ruler, locate the center of the opposite plane of your isometric triangle. Once found, draw a vertical line of the same length as the first one you created on the front facing plane. This additional vertical line will help maintain symmetry and proportionality in your drawing.
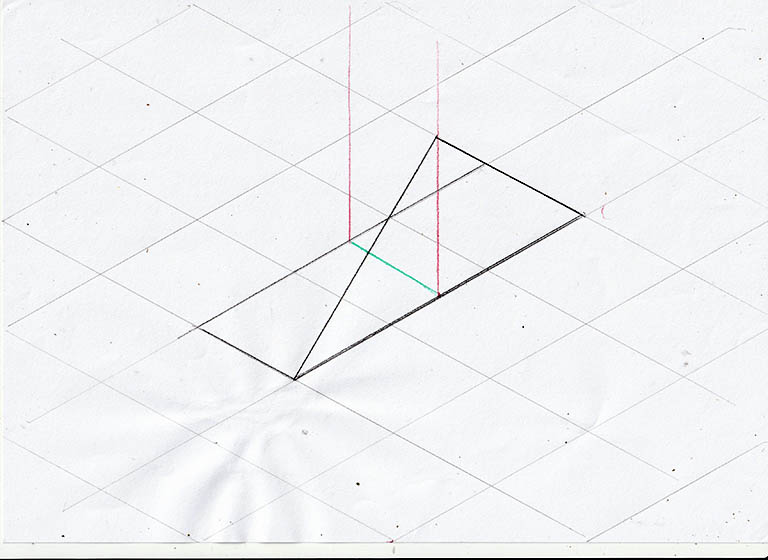
Now, connect the lines you’ve drawn to form your triangle. Use an eraser to carefully remove the construction lines, leaving you with a clean and precise isometric triangle.
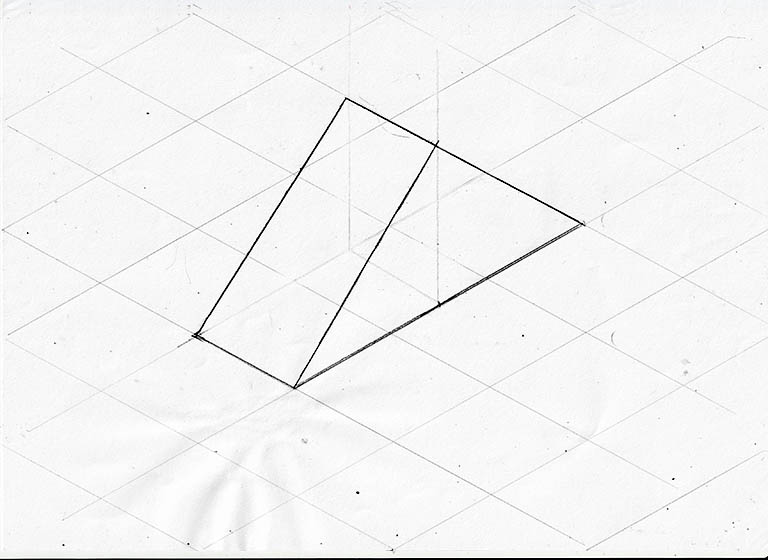
Pyramids and Cones
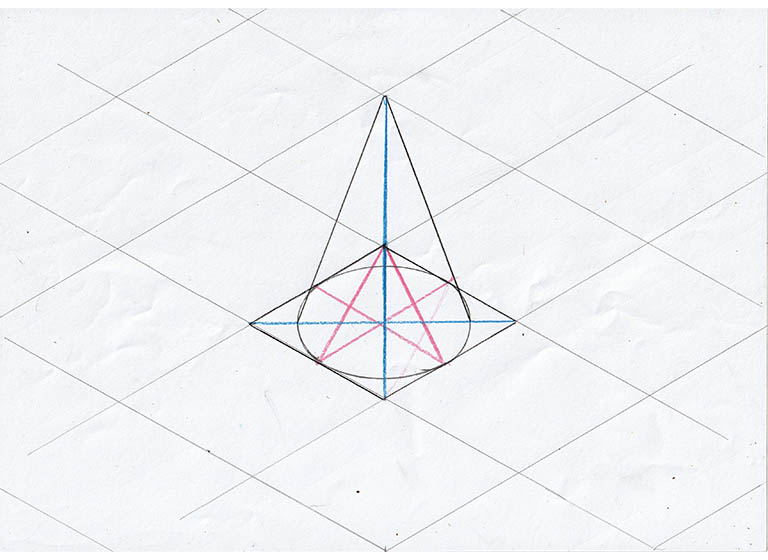
Begin by drawing a square base on your isometric grid. This square will serve as the foundation for your pyramid or cone.
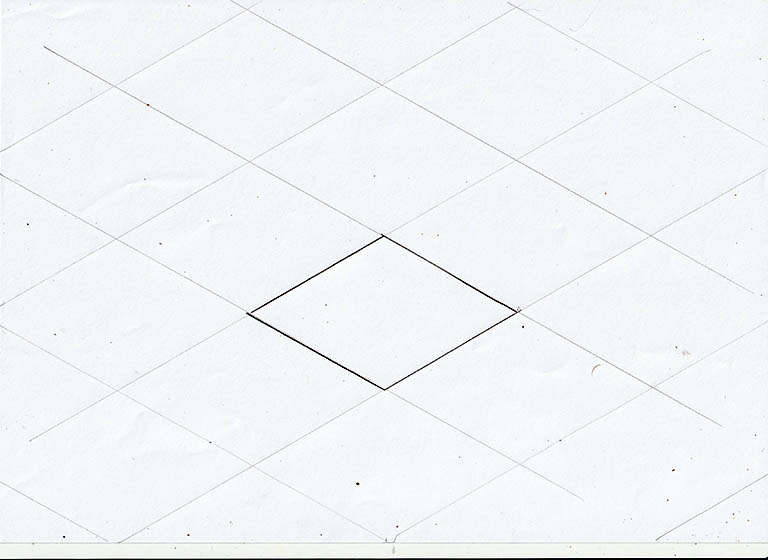
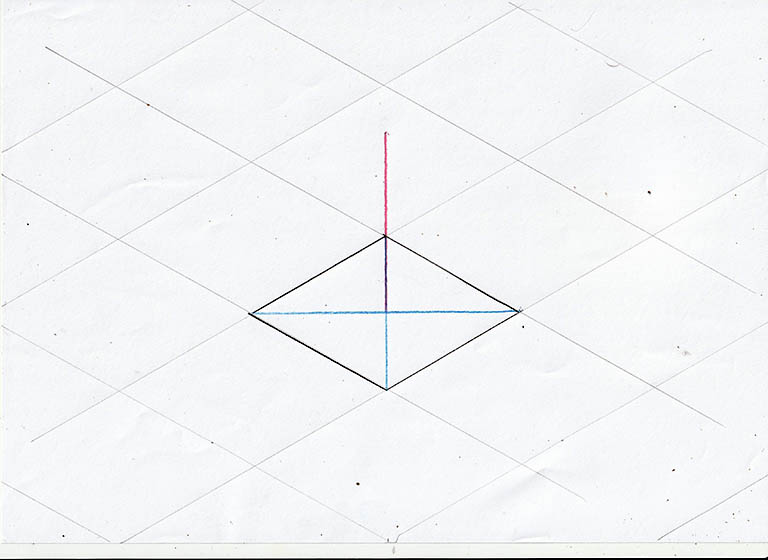
Next you need to locate the center of the square base, draw two diagonal lines from corner to corner, halving and quartering the base. Where these lines intersect, make a mark; this marks the center. From this center point, draw a vertical line extending upward. This vertical line defines the top of our pyramid or cone.
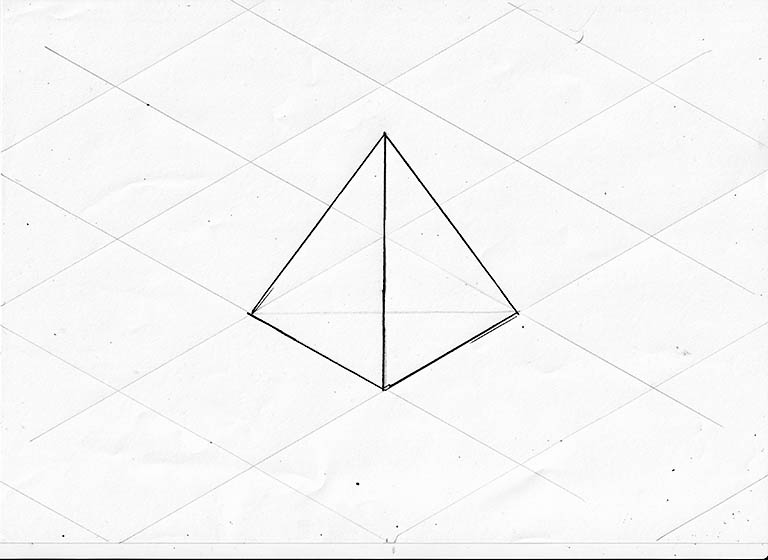
For the pyramid, join the top of the vertical line with the front and side corners of the base. This connection forms the two front-facing planes, and once you have removed the construction lines, our pyramid is complete.
For a cone, once we have our square base and have added the diagonal lines from each of the base’s corners, we then draw lines that intersect at the center point where the diagonal lines meet. These centerlines should run parallel to the side planes of the square base.
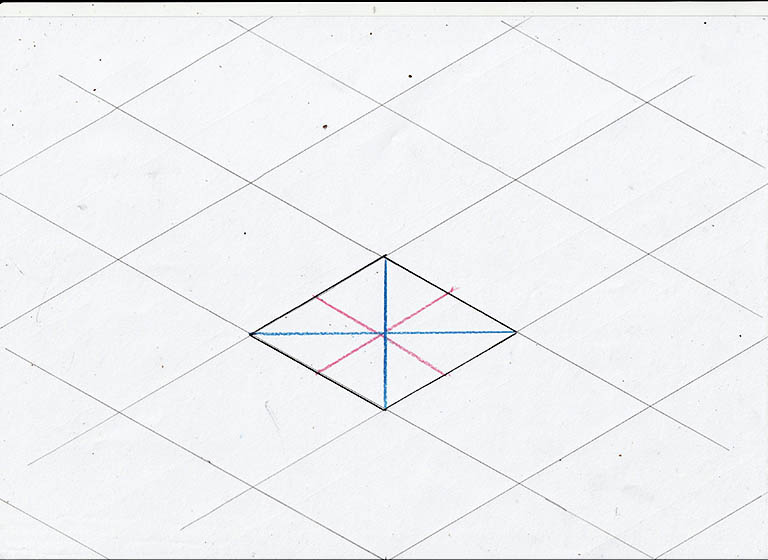
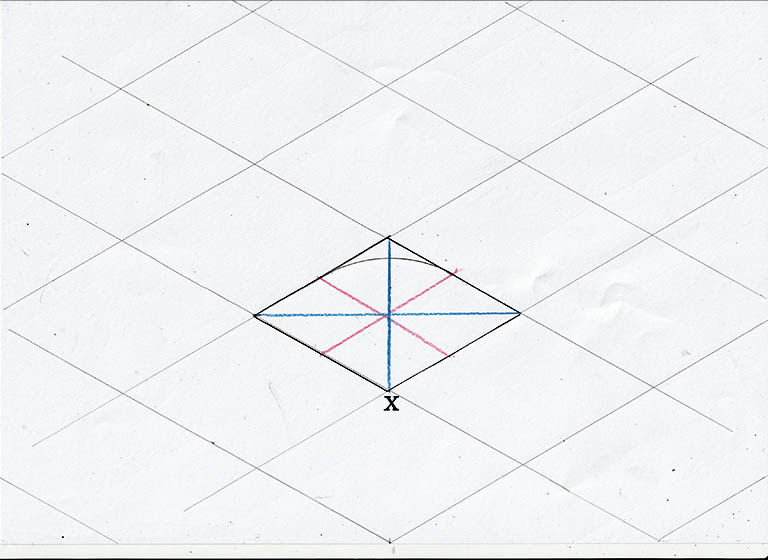
Repeat this step but for the opposite curve on the bottom.
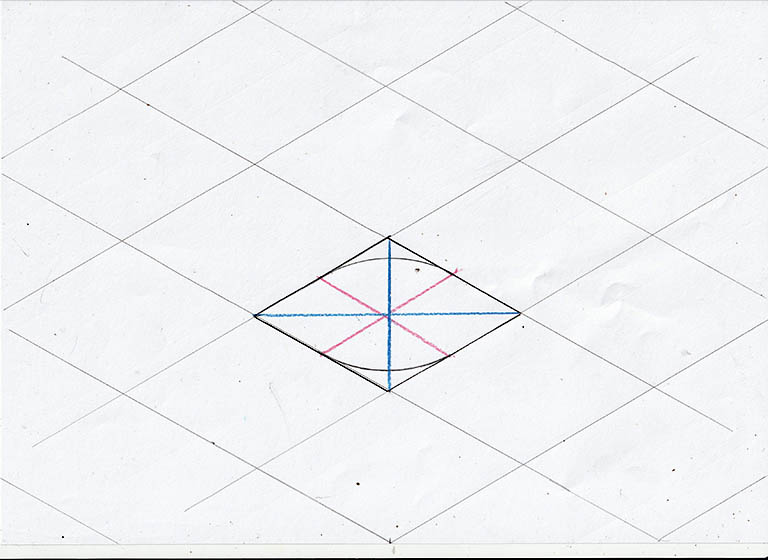
Next, draw in diagonal lines that run from the top corner to the red lines at the bottom side planes of the base.
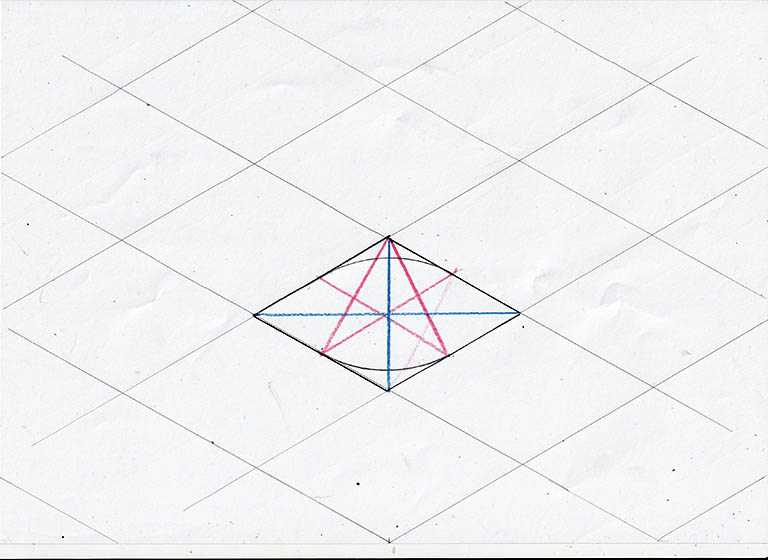
To draw the side curves, place the pin of your compass at the point where the diagonal red line intersects with the blue horizontal line, marked here with x’s and draw in the curves.
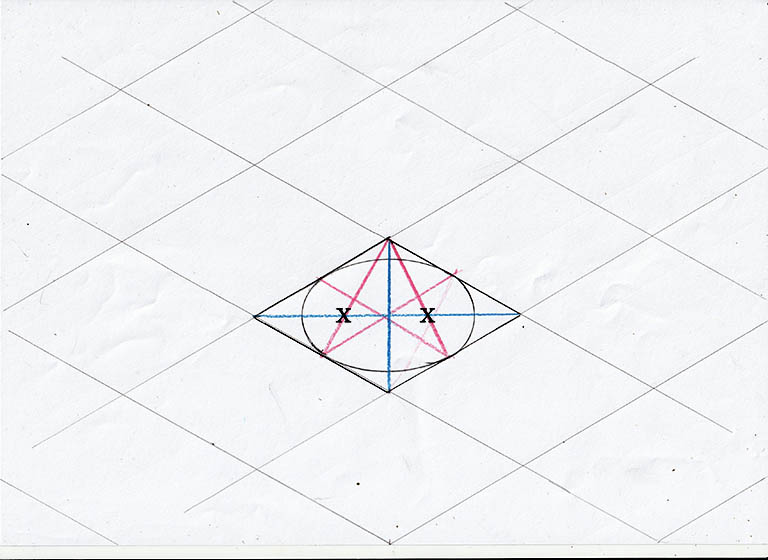
To complete the cone, draw a vertical line from the center to define the height and point of the cone. Then, draw in sides of the cone from the top of the point, to the edge of the base circle where the blue horizontal line intersects the edge of the circle.
Illustrating in Isometric Perspective
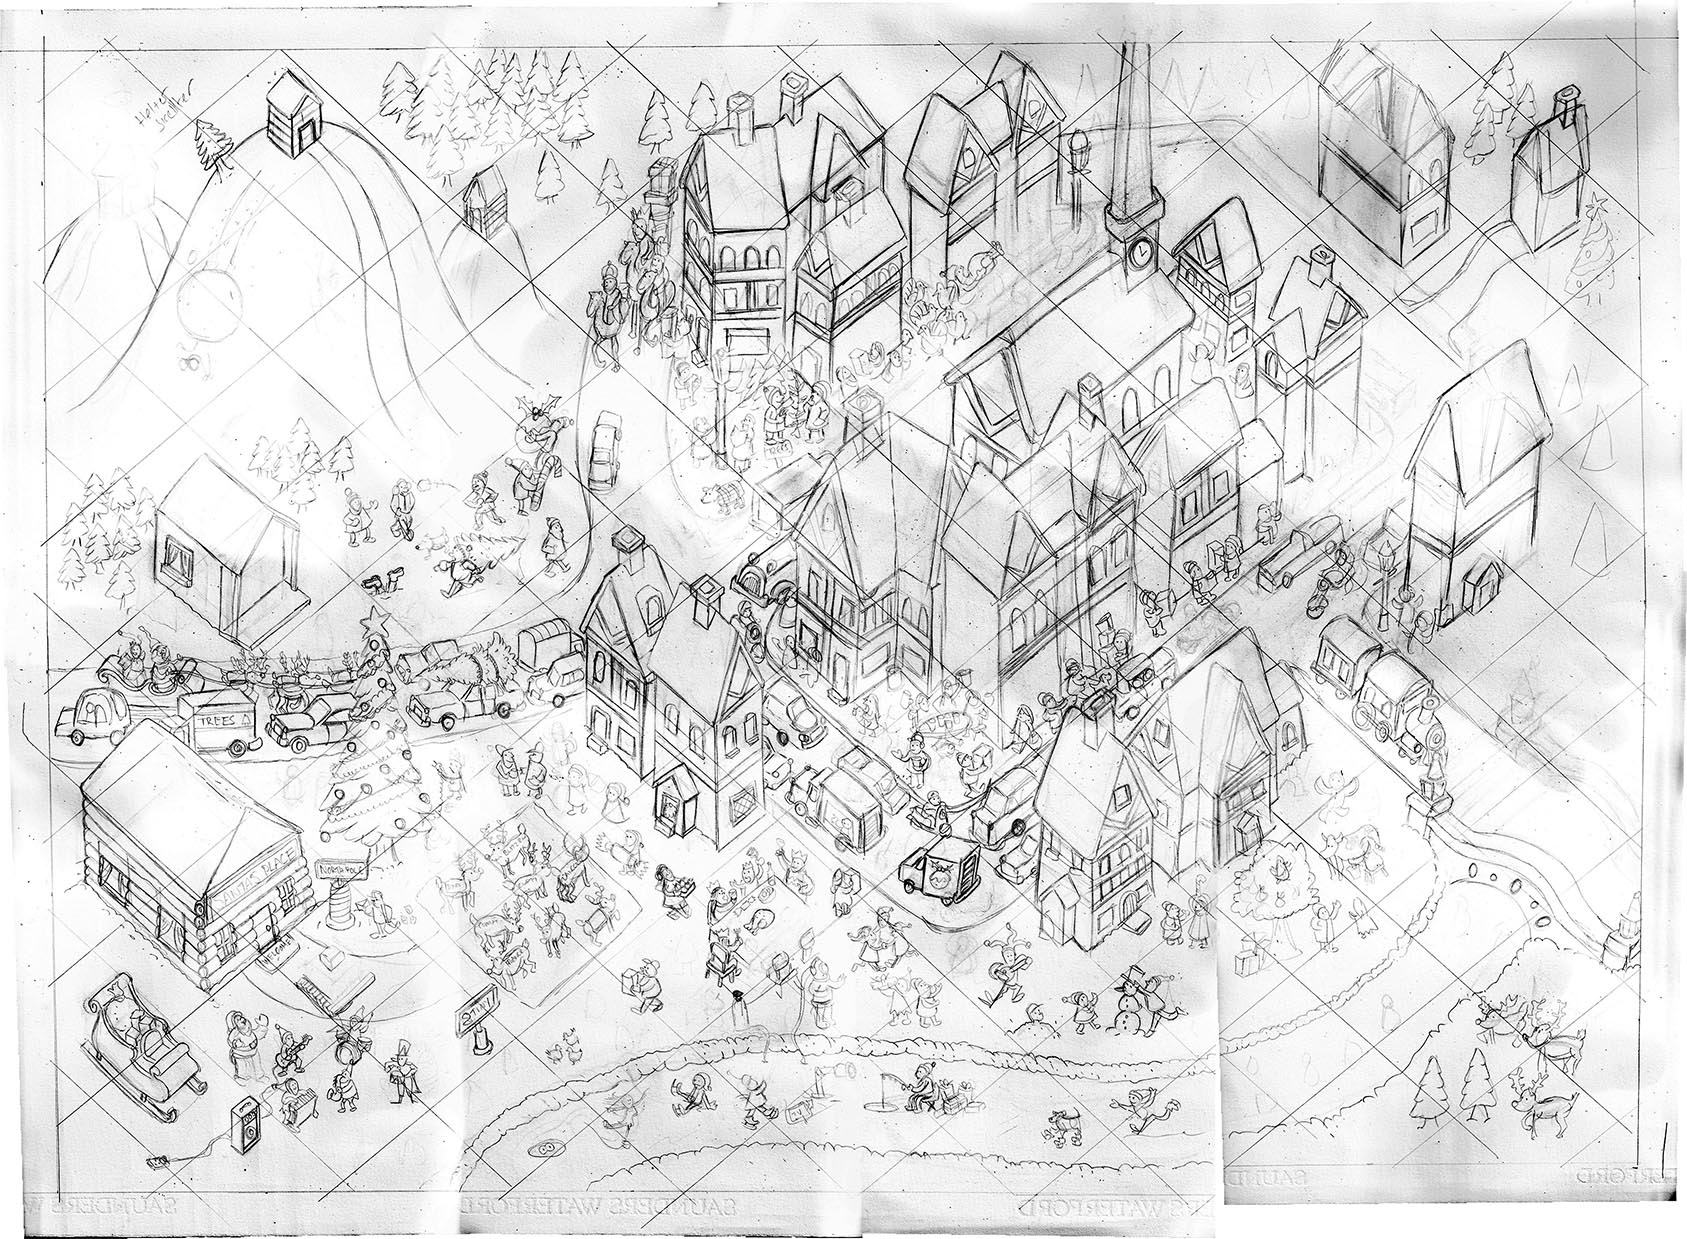
Take a look at the example illustration below. Despite its intricate appearance, it’s all about arranging isometric shapes on a grid and adding details. Notice how the diagonal lines of the buildings, roads and cars follow the parallel lines of the isometric grid.
A key benefit of isometric perspective is that you can keep expanding your composition outward along the grid without worrying about objects going out of perspective. As long as you follow the grid lines, everything will remain in perspective.
In conclusion, I hope you’ve found this guide on creating art using isometric perspective both interesting and helpful. If you’ve enjoyed this article and found it useful, please don’t hesitate to share it with others who may also be interested in this unique artistic perspective. Thank you for reading!
