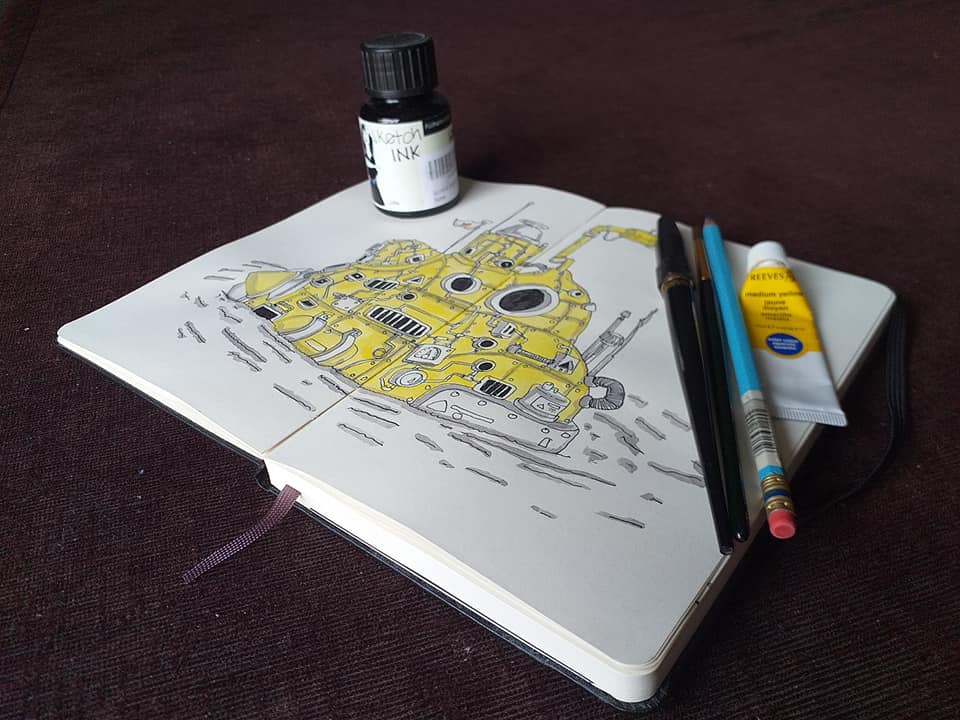
Scanning our sketchbook drawings opens up new possibilities, preserving our art for sharing with a wider audience. One unique aspect we encounter is the centerfold line or “gutter,” which some may consider as part of the sketchbook’s charm. However, if you prefer a seamless digital presentation or want to refine your artwork further, we’ve got you covered. In this step-by-step tutorial, we’ll explore Photoshop’s “Content-Aware” function to gently bid farewell to the centerfold line while respecting the essence of our artistic expressions.
Note: The instructions provided are based on Adobe Photoshop 2023. Similar features may be available in other image editing software with content-aware capabilities.
Getting Started:
Launch Adobe Photoshop and open the scanned sketchbook drawing you want to edit.
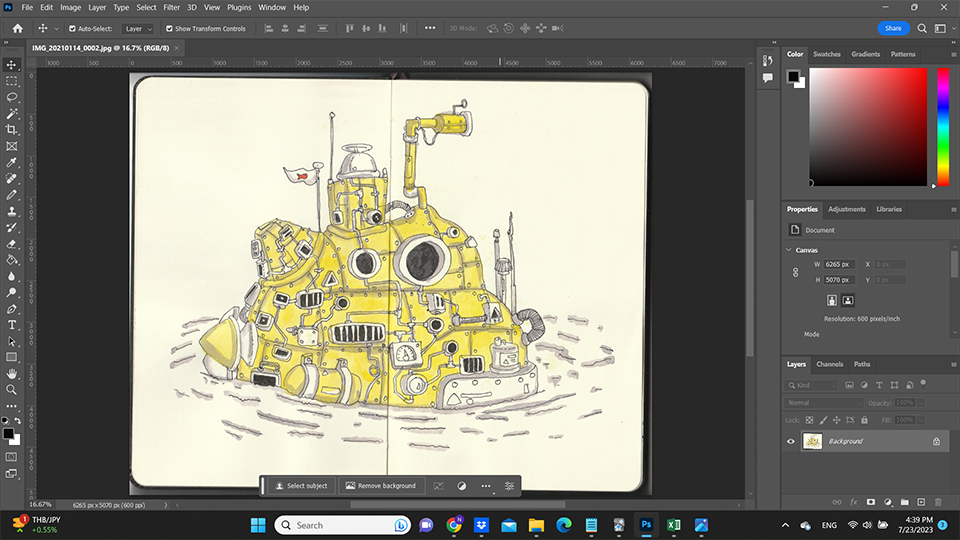
Selecting the Centerfold Line:
Now that your sketchbook drawing is open in Photoshop, the next step is to select the centerfold line, which we’ll later remove using Photoshop’s “Content-Aware Fill” tool. Follow these instructions to make an accurate selection:
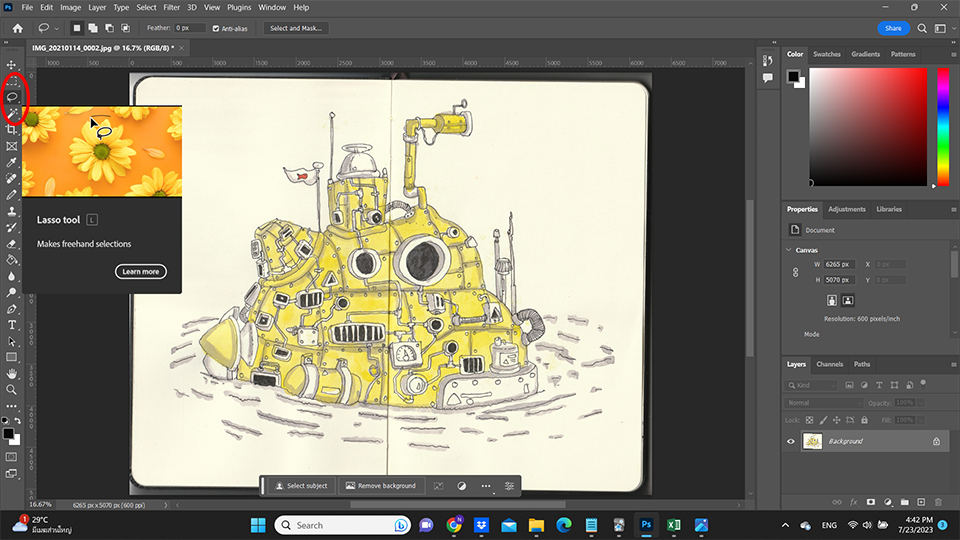
Activate the Lasso Tool:
In the left toolbar, select the “Lasso Tool.” It may appear as a freehand lasso, polygonal lasso, or magnetic lasso, depending on your Photoshop version. For this tutorial, any of these lasso tools will work. If you’re not sure which one to choose, the standard freehand lasso tool is sufficient.
Zoom In for Precision:
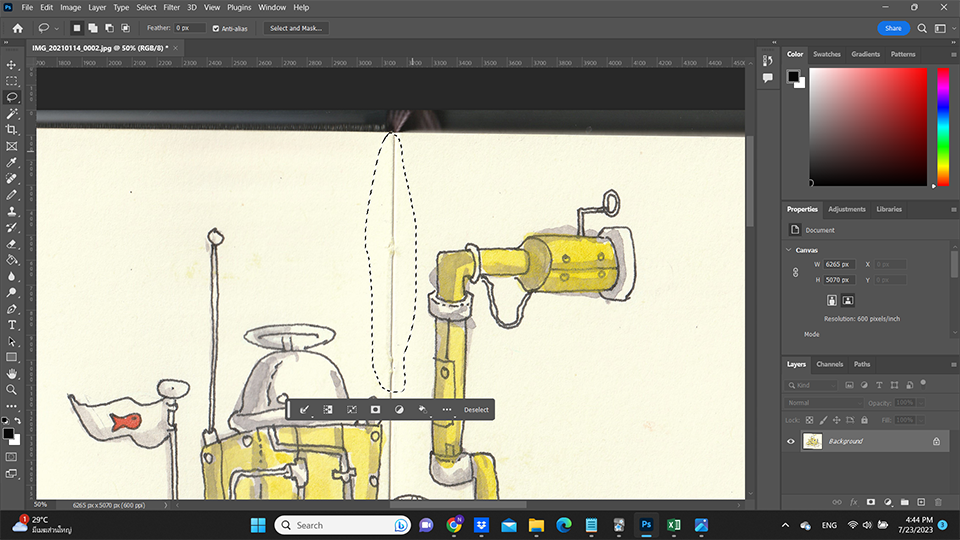
To make precise selections, zoom in on the area containing the centerfold line. You can do this by pressing “Ctrl” (or “Cmd” on Mac) and using the – + keys to zoom in or out. Alternatively, use the zoom tool in the left toolbar.
Draw Around the Centerfold Line:
With the lasso tool selected, carefully draw around a section of the centerfold line. Start from one end and work your way along the crease, creating a closed selection that covers the line. It’s okay if the selection overlaps with the artwork slightly.
Using Content-Aware Fill:
Now that you have made a precise selection around the centerfold line, it’s time to bid it farewell with Photoshop’s powerful “Content-Aware Fill” feature. This tool magically removes the selected area while intelligently filling it with surrounding content, resulting in a seamless and natural look.
With your centerfold line selection active, go to the top menu and click on “Edit.”From the dropdown menu, select “Fill,” or you can use the keyboard shortcut “Shift + F5” (Windows) or “Shift + Delete” (Mac).
The “Fill” dialog will appear, offering several options for filling the selection. In the “Contents” dropdown menu, select “Content-Aware” and click “OK”.
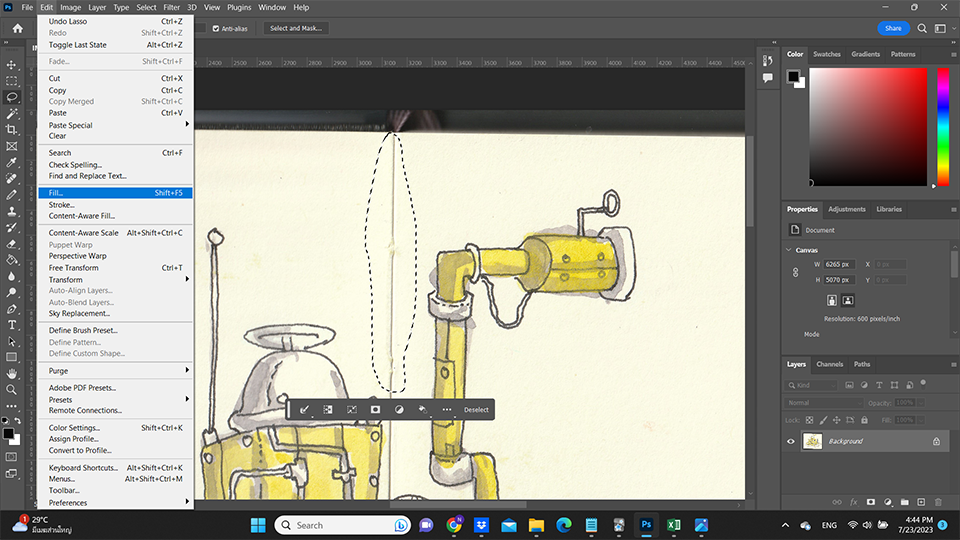
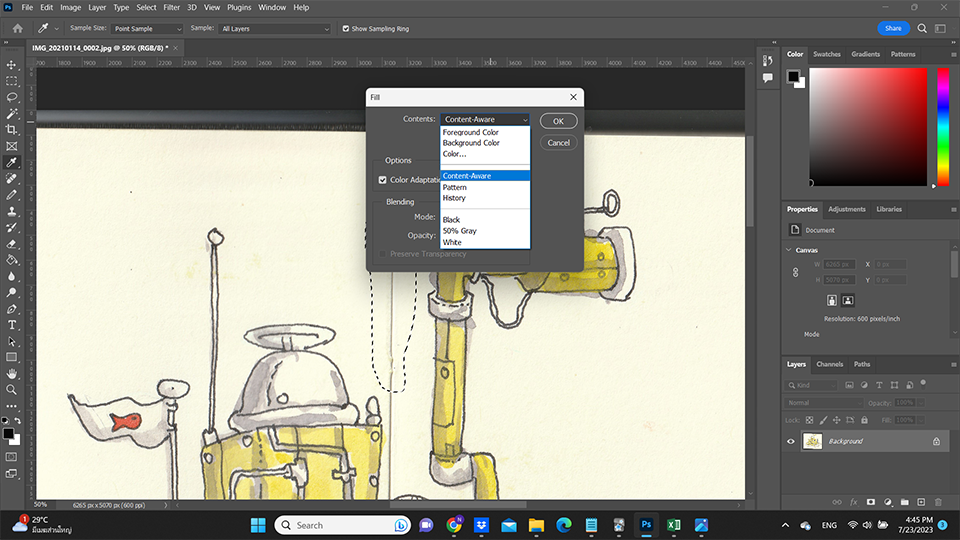
Once you click “OK.” Photoshop will work its magic, and the selected centerfold line will vanish, leaving behind a seamless blend of the surrounding artwork. Repeat the process by selecting and removing the rest of the centerfold line bit by bit until you have completlly removed it.
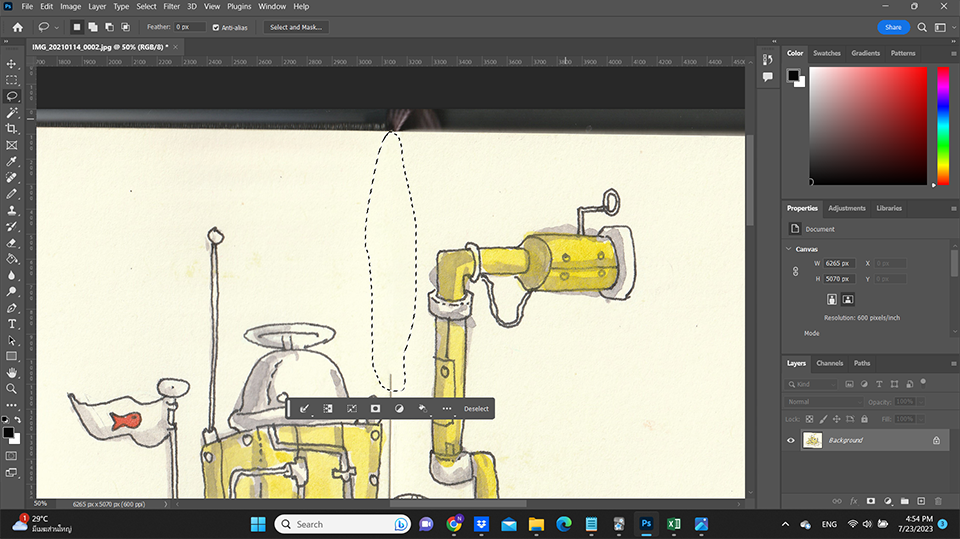
With the centerfold line successfully removed, you can now enjoy a pristine version of your scanned sketchbook drawing. However, don’t forget to review the edited areas for any imperfections or artifacts that may require further refinement.

Congratulations! You’ve successfully learned how to remove the centerfold line from your scanned sketchbook drawings using Photoshop’s “Content-Aware Fill” tool. This powerful technique allows you to transform your traditional artwork into seamless and polished digital representations, ready to be shared with the world.
